This project originally started out as “hand print” stepping stones for my husband for Father’s Day. However, that’s not how they turned out because you cannot use a bag of concrete, that you found lying in the garage, in the same way that you’d use plaster.
Basically, concrete is concrete – it’s not at all like plaster. Concrete is hard when it’s dry, and hard when it’s wet. I could barely stir it with the wood cooking spoon I was using to mix it. This was one of those moments where I was very happy that my husband wasn’t able to witness my stupidity. (Sure! Let me make stepping stones with a 50 pound bag of concrete, a pitcher of water and my cooking spoon!) Ugh.
After stirring, and stirring some more, I realized things weren’t going my way. I couldn’t even push the spoon into it. They were wet and solid. They quickly started to harden (guess that’s why it’s called Quickcrete). I tried racking my brain for something to do with them, but came up with nothing. I hid my little foil grill pans full of concrete behind the kid’s playhouse, so my husband wouldn’t find my latest “masterpiece.”
It was a really good hiding spot. They have been back there well over a month and he still hasn’t stumbled across them. (Hee, hee.)
I was thinking about throwing them out, but then I thought they might be cute if we painted them. So I gathered up the kiddos, mixed up some paint and let the kids go to town. But, when they were finished paiting them, they just looked like giant colored concrete bricks. Double ugh!
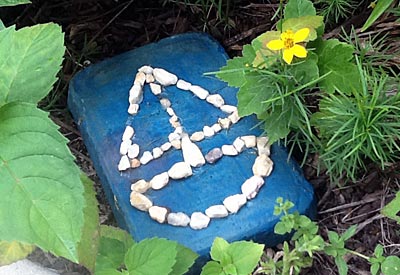
So I decided to take over the kid’s art project and make some modifications. I drew simple designs on them and glued some pebbles to them. I was really surprised at how cute they turned out and promptly put them in our garden…where my husband could find them!
DIY CONCRETE GARDEN BRICKS
Materials:
- quick setting concrete (I used Quickcrete.)
- water
- foil containers
- acrylic paint
- paintbrush
- decorations (pebbles, beach glass, etc)
- rubber cement
- matte finish spray
Directions:
Step 1: Fill a small container with quick setting concrete like Quickcrete and mix with water. Follow the directions on the bag. Allow to completely dry. Remove from container. (I used foil Weber grill catch containers.)

Step 2: Mix acrylic paint with a little water. Paint the entire brick. For a more vibrant color lay in the sun and paint another layer each time the last layer dries. We did about 5 layers of paint.

Step 3: Draw a simple design or shape on the brick with pencil.

Step 4: Gather some pebbles and glue them to the brick using rubber cement. Let dry.

Step 5: Spray with a matte finish spray. Place in garden.

[…] DIY Concrete Garden Bricks from We Know Stuff […]