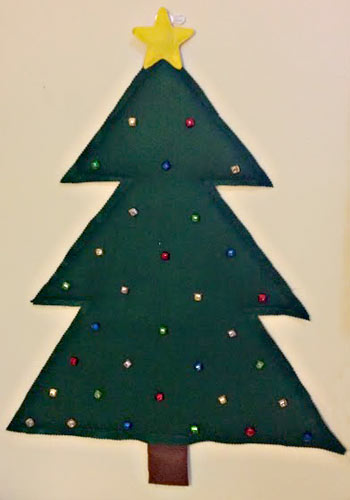
My mom is an amazing seamstress and has an endless abundance of cool creativity. She can do things with a needle and thread that look virtually impossible, and when I was little, she made an advent tree with beautiful ornaments. Every Christmas, when we’d decorate the house, I most looked forward to hanging that tree and putting on the ornaments – studying the details on them, admiring how they sparkled. To me, it’s one of my personal symbols of Christmastime.
When my son, Ryan, came along and started moving, I wanted to do something similar, even if it was only to keep him from playing with our actual Christmas tree! Using Pinterest, and my mom’s tree as a guide, I got started.
Materials:
- Green felt
- Green thread
- A needle or sewing machine
- Batting
- Cardboard
- Yellow felt for the star, brown felt for the trunk
- Felt, in a variety of colors for the ornaments
- Decorative items for the ornaments (depending on your own creativity and the ornaments you choose to make)
- Felt dots (preferably red!), red buttons, or jingle bells
Directions:
Step 1: Make a pattern for your tree.
Since I started this project over a year ago (Oops, not enough hours in the day), I don’t have any pictures of this step. Basically, I determined the size I wanted my final tree to be, sketched it on a large piece of cardboard, and cut it out. Then I traced my pattern twice on my green felt (purchased from Hobby Lobby) and cut it out with pinking shears. Now I had two identical trees, one for the front and one as the back.

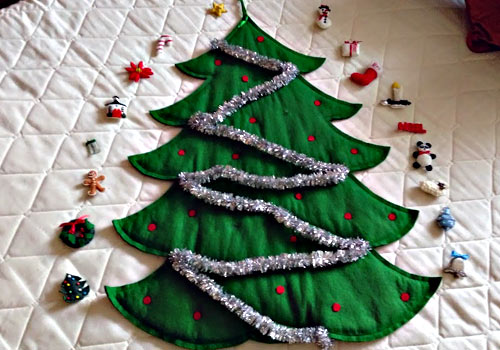
Step 2: To make your tree appear a little fuller, trace your tree on some batting and layer it between your two tree pieces. (You may need to trim the batting about ½ an inch so it didn’t show outside of your tree). To prevent your branches from curling in, trim your cardboard template a bit for stability. Now you’ll have a “tree sandwich” as seen above: green felt tree (the back of the tree), cardboard template, batting, green felt tree (the front of the tree).
Step 3 (optional): My mom’s tree doesn’t have a trunk, but I decided to add one to mine. If you choose to do this step, you can simply eyeball a trunk like I did and cut it out of two pieces of brown felt. I didn’t sandwich the trunk with batting, and I was a little nervous that it would look weird, but actually turned out great.
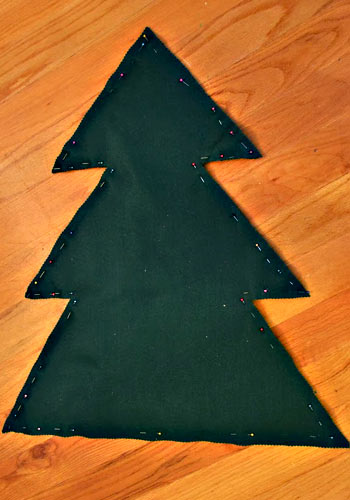
Step 4: Put the tree together.
There are a few options for this step:
- Hand sew
- Use a sewing machine
- Use Stitch Witchery
I love using Stitch Witchery, but I worried that it wouldn’t be strong enough to stand the test of time with my Toddler Tornado. My ideal option would have been to use my sewing machine, but having recently waged war on it, that option was out, so I ended up having to hand-sew the tree together.
If you are making this tree for older children (or ones that are not Toddler Tornadoes like mine), Stitch Witchery would be great to use. If you opt to use your sewing machine, this step will be much faster – think approximately ½ an hour, if that. Unfortunately, hand-stitching took a lot longer – about 2 hours total, spread out over a few days – but it got the job done easily.
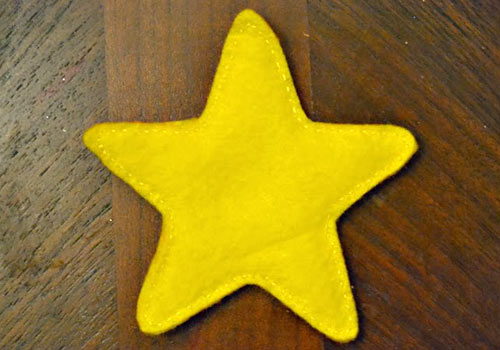
I used a cookie cutter to create a template. Then I traced my template onto some felt, sewed my star together, and hot glued it onto the top of my tree.
Step 6: Figure out how you’re going to attach the ornaments to your tree.
My mom used red Velcro dots, but despite an intense search, I couldn’t find them anywhere! I could have used white, but I really like how the red dots make the tree look decorated without any ornaments.
I saw some people use buttons on Pinterest, which was the plan I was going to follow…but when I walked into Michaels and saw some festively colored jingle bells, I was sold. I came home, laid them out on my tree, and then hot glued them on. (After hand-sewing my tree together, I was so done with a needle and thread!) I used a dime to mark my place whenever I lifted a bell to put glue on it. This step took only five minutes, but I think it REALLY makes the tree!

Step 7: Hang your tree (I used Command strips – I LOVE them). Now, the fun part can begin: decorating it!!!
Creating the ornaments for this tree can be as involved or as simple as you’d like. Last year, I bought a couple of ornaments from Target, which will work perfectly for this tree and require zero effort on my part. However, I really wanted to make as many of the ornaments as I could, and if possible, include Ryan. Taking a cue from my mom’s tree, I hit up Pinterest (again) for some ideas.
Being that I do not have my mom’s abilities with a needle and thread, I chose to do some of the easier ornaments for this go around. The basics of how to make an ornament are:
Step 1: Create a template for your ornament using whatever you have on hand: paper, cardstock, cardboard. Since I have no artistic ability, I traced cookie cutters to create my templates.

Step 2: Trace your template onto felt. You will need two of the shapes in order to create a front and a back.
Step 3: Decide how you would ultimately like your ornament to look. If there are any decorations that need to be put on before you sew the ornament together, do so. Ryan’s name needed to be sewn on before I put the ornament together; the stripes for my candy cane needed to wait until after I’d sewn and stuffed it.
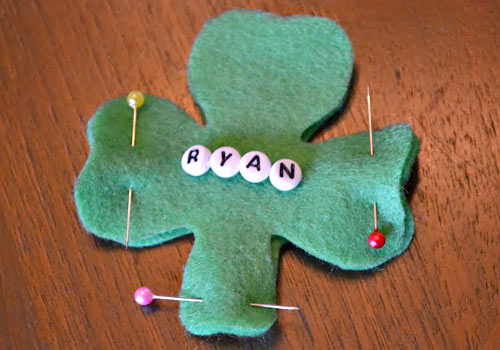
Step 4: Pin the pieces together and sew. If you’d like to stuff the ornament with batting to make it fuller, then leave an opening to put in batting; otherwise, sew the entire thing together.
Step 5 (optional): Using small amounts of batting at a time, stuff your ornament. Then sew it closed!
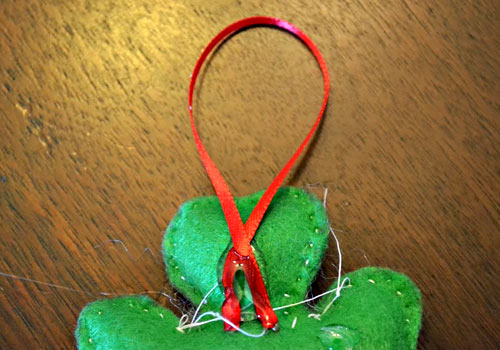
Step 6: Cut out a piece of ribbon. This will be the “hook” for your ornament, so cut it however long or short you want your ornament to hang. Form a loop and hot glue it to the back of the ornament.
Step 7: Decorate your tree however you’d like!
I really wanted Ryan to be able to put his own stamp on our tree, so we divided up the ornaments. For the ones that I wanted to look perfect, I simply decorated them myself. Then, to make sure that we had lots of “Keepsake Ornaments” from him, I handed Ryan a batch along with some with some glitter, puffy paint, glue and sequins, and let him go to town. I think those ornaments came out the best – they’re just perfect.
Merry Christmas!!!
Brianne Sheets Patterson
Leave a Reply