Even though the first day of spring has already passed, it’s still way to cold for us to plant anything outside yet. In our neck of the woods, it isn’t really safe to put anything in the ground until after the last frost, which is somewhere around Mother’s Day and that’s still a long way off. This leaves people like me really antsy, especially after staring at mounds of snow for one too many weeks.
To combat a serious lack of Vitamin D and the smell of freshly grown green things, I can often be found starting seeds indoors with our kids. Each year, they get a kick out of our seed starting projects and it’s become a weird, quirky tradition in our home.

To keep our seed starting projects focused on them and their interest in gardening, I encourage them to pick out the seeds that we will grow. I never discourage their choices and only offer advice when asked. This often leads to a bizarre little collection of seeds, but it keeps them interested and involved – and that’s the whole point.
They also love testing out new containers to see which ones will work or not. In the past, we’ve used all sorts of recyclables to pot up seeds in like yogurt containers, berry baskets, tin cans, and other more, but we had yet to try out the most basic seed starting container of them all. The toilet paper roll.

Seeing that we have an endless supply of empty toilet paper rolls in our home, I thought it would be a perfect way to put them to good use. They are very easy to use and due to their recyclable nature, the kids can just plant the entire tubes in the ground once it has thawed.
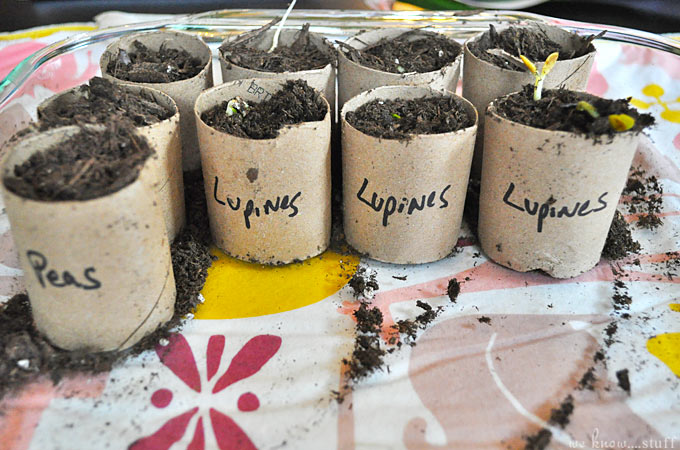
There are several ways to use toilet paper rolls as seed starting containers. You can cut the bottoms into flaps and fold them under, or you can just leave them as tubes and rest them carefully in a large glass tray as we have done. I prefer this method because it allows the roots to grow down and the plants to grow up. However, if you like the flap method for a neater display, just make sure you unfold the flaps before planting your tubes in the ground.

TOILET PAPER ROLL SEED STARTERS
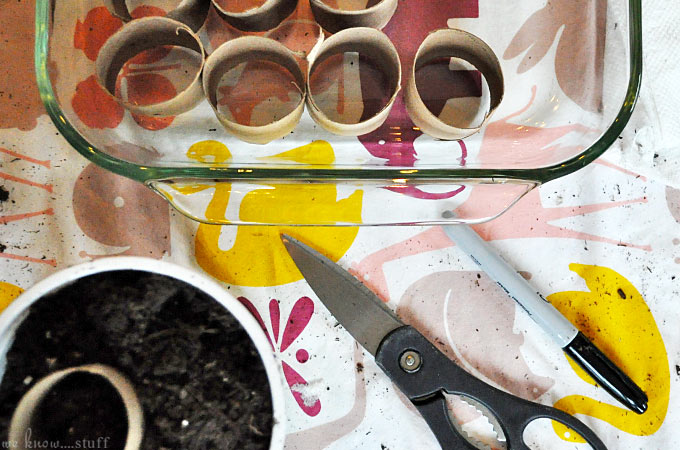
Materials:
- Used toilet paper rolls
- Seeds
- Potting soil
- Water & Dropper (we used an old medicine dropper)
- Windows (We used East and South-facing ones)
- Sharpie
- Sunlight

Directions:
Step 1: Arrange all of your materials on a large work surface. You may want to cover your table with a large sheet for easy clean up as this is a messy project. Kids 8 and older can probably do this gardening craft on their own, but smaller hands will need help getting the soil and seeds into the toilet paper roll.
Step 2: Cut your toilet paper rolls in half. Using a sharpie, write the name of the seeds on each roll. This will keep your organized as they start to grow. Place your toilet paper rolls in a large tray (we used a glass pyrex lasagna tray).
Step 3: Fill each toilet paper toll with potting soil and gently tamp down. Make a small hole in each one and plant seeds according to package directions (larger seeds like peas may need their own paper towel rolls, smaller ones like chives may be planted together).
Step 4: Carefully water the seeds using a water dropper. You don’t want everything to be sopping wet or else it will mold. Just moisten the soil.
Step 5: Wrap the tray loosely with saran wrap. You need to create a little microclimate in the tray! Place near a sunny window, but not too close to a heat source or they will shrivel and die.
Step 6: Check on your seeds every few days. Some will germinate faster than others. Your kids will be able to clearly see the growth of the roots and then the shoot. If you notice any rot occurring, throw those rolls out so they don’t infect any other seedlings.
Step 7: Once the ground has thawed and your seedlings are established little plants, you can carefully pot them up in a bigger container if they still need some TLC, or you can plant them in the ground. Remember to compost your paper towel rolls – just rip them up and add them to your bin!
Do you use recyclables to pot up plants? Let us know what your favorite recyclables are in the comments below. Or, tag us on Instagram, @weknowstuff, so we can stop by and see what you’ve been up to!
Happy Planting,
Denine

I am planning to do this with children ages 7-12 at the library where I work. I had a few questions re: what seeds to plant, watering, transplanting…
? I don’t really want to have to get into thinning the plants…should I go with flowers…what flowers are easy to grow from seed (bigger seeds)
?would a plant mister work just as well, I do have several eye droppers at the library available though 🙂
?how long does the cling wrap need to stay on? just until they germinate?
?how long before you have to plant them in a bigger pot(s)? I live in NS, Canada and we won’t be able to plant for another 6-7 weeks outside
?do you need to “harden off” the plants by placing them outside in the day before planting them in the garden
Thanks so much!
Lois Burgess
Hi Lori, I’m so sorry that I just saw this comment! In case you’re still in need of answers, I’ll do my best to supply you with some.
1.) I found regular garden peas to be the BEST thing to grow. The seeds are very large, which makes them easy to separate out. You can do 1 -2 seeds per roll. (Don’t forget to look at the plastic baggie option too – that one is a much “neater” way to seed start.)
2.) A plant mister will work just fine!
3.) Cling wrap until they germinate.
4.) A few weeks before transplanting – they should have at least 2-3″ of growth.
5.) I always harden off my plants because I live in NY. 🙂
This is such a cute idea. I’m getting ready to plant seeds with my kids and they would love this. Thanks for sharing. Saw on Pinterest.
Hi Marci, Thanks for stopping by. We really like the simplicity of using toilet paper rolls. The kids can get nice and messy, and as long as you cover your table with a sheet, you don’t have to worry about the clean up! 😉 Let us know how it goes…