Are you looking for a cool science fair project? Why not learn how to Make An Electromagnet With Kids? Made in just 4 easy steps, with just a few basic supplies, this Battery Magnet is a great STEM project. 
A few days ago, a flyer came home in my son’s homework folder announcing the start of a Robotics Club at his school. My son eagerly announced that he wanted to join, so I filled out the paperwork and sent it in. Unfortunately, so many students signed up that the school had to turn acceptance into the club into a lottery-based system.
It sounds sad, but it’s not really. I’m actually pretty excited that the school had such a phenomenal response to this club. Of course, I wish we got in, but as my youngest likes to chant throughout the house, “You get what you get, and you don’t get upset.”
I wasn’t too concerned, but my son was a bit bummed. I simply told him that we would make our own STEM-based Robotics Club at home and he would get to pick the projects. He was pretty psyched about having that much control over the experiments, so we went to visit Science Bob and picked out the first experiment: how to make an electromagnet with kids. Or, in layman’s terms – a battery magnet.

We weren’t quite sure how an electromagnet differed from a fridge magnet, so we kept reading. We found out that permanent magnets cannot be turned off. These are the magnets that hold up our children’s artwork on our fridge. But an electromagnet is a magnet that can be turned on and off. These magnets run on electricity and can only be magnetic when electricity is running through them.
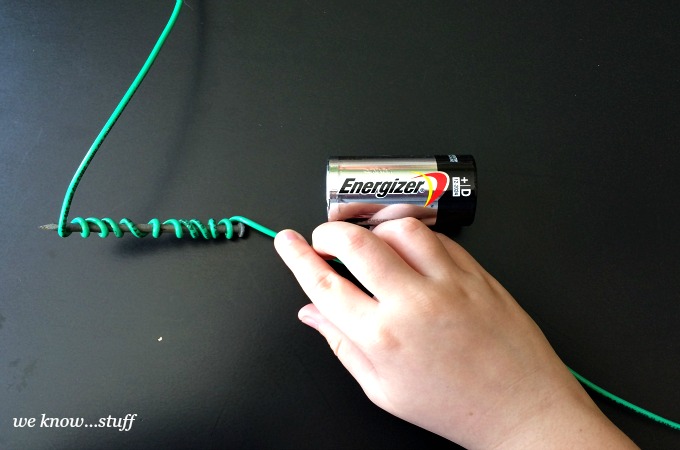
In this STEM project, we wrapped a thin-coated copper wire around a long iron nail and attached it to a D-size battery. When both ends of the wire are attached to the battery, the electricity flows through the wire and rearranges the molecules in the nail so they become attracted to certain metals. When the wires are removed from the battery, the nail goes back to its original, nonmagnetic state. Isn’t that cool?!
This project is very simple to do and only needs a few basic materials. It’s a great beginner’s STEM project to do and will boost a child’s confidence in taking on more complicated STEM-based experiments! This project requires Adult supervision and/or assistance.
How To Make An Electromagnet With Kids (Battery Magnet)
Materials need to make an electromagnet with kids:
- 1 D battery (to work properly, it should be a new battery, not an old one)
- At least 3 feet of thinly coated copper wire
- A large iron nail (at least 3 inches long)
- A variety of small, lightweight magnetic objects (paper clips work really well)
- Electrical tape
- Wire cutters
Directions on how to make an electromagnet with kids:
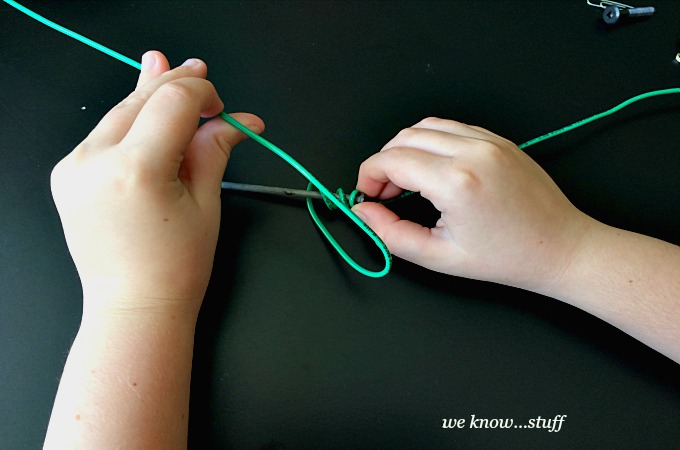
Step 1: Find the middle point of the copper wire and start wrapping it around the nail. Wrap it around the nail as many times as you can without overlapping the wires.
Step 2: You will need at least 8 inches of wire left over on both sides of the nail. If your piece of wire is too long, simply cut it to size.
Step 3: Carefully remove approximately 1 inch of the thin plastic coating from both ends of the wire. Place one end of the wire on one end of the battery and secure it in place with clear tape. Then attach the other side of the wire to the other end of the battery. Again, use tape to secure it in place.
NOTE: Once both ends are attached in place, the wire and battery will get hot. So, please be careful!

Step 4: Guess what? You’ve just built your very own electromagnet! Congratulations!
Now you should be able to use it to pick up some lightweight magnetic objects. Simply point the tip of the nail near a few items, like paper clips, and watch them connect! During your experiment, see what else your electromagnet will or will not pick up. We tried thinly coated paperclips, some white hooks, a small binder clip and some nails.
When you are finished experimenting, disconnect the wires. The battery will be very warm, so please be careful.
NOTE: You are working with electricity. Please be safe and never-ever place the wires of your electromagnet anywhere near a household outlet!
Have you ever built an electromagnet with kids? What kind of STEM projects do you like to do at home?
Denine
Want to see more STEM kids crafts?
- Cotton Candy Experiment
- stem-time fun at our goldieblox bash
- our 18 favorite stem toys for kids
- stem learning: pumpkin catapult for kids


This is such a great science experiment. I’m not sure I even knew the difference between a regular magnet and an electromagnet. Love learning new things. #client