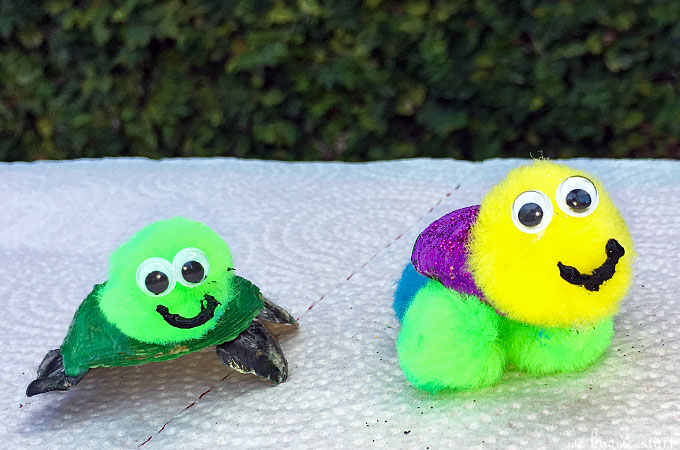
Take advantage of the beautiful weather outdoors, gather up some sea shells, and make this fun sea shell turtles craft for kids.

IT’S SUMMER!!!! Even though Florida feels like summer all year round there is something I enjoy about the extra humidity and lack of schedule. In my family, summer means sleeping in late (which is unfortunately only 8am), tons of ice cream, and frequent trips to the beach.
With our crystal blue waters, it’s also easy to spot a sea turtle while snorkeling or diving and that’s why we decided to make sea turtles out of sea shells this month.

Sea shells can be bought on Amazon, or you can head on over to your local beach and enjoy the fresh ocean air while your little ones go hunting for the perfect turtle “shell.” Don’t forget to look for smaller shells too for the feet!
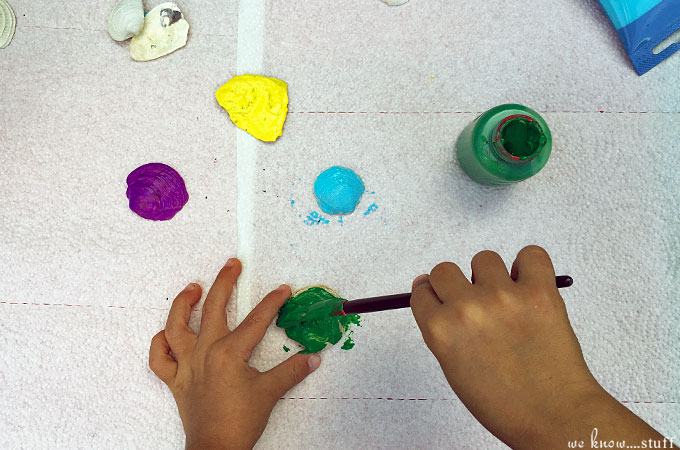
When it comes to painting, I don’t like telling me kids what something “has” to look like, so I let them do whatever they want. Does your daughter want a pink sea turtle? Why not! The more colors, the better! My boys used green, turquoise, and yellow for their kids turtle craft. I also recommend applying some Mod Podge to this kids turtle craft so that the paint doesn’t chip off once it’s dry.

Don’t forget to make our cute summer kids craft educational too! Here are some Fun Sea Turtle Facts to share:
Did you know that…
- The turtle’s upper shell that protects them like a shield is called a ‘carapace.’
- Sea turtles are reptiles, which means they have scaly skin, breathe air, are cold-blooded and lay eggs.
- Green Sea Turtles can stay underwater for up to five hours.
- Leatherback sea turtles can weigh up to 1,000 pounds!
Take advantage of the beautiful weather outdoors and gather up some sea shells, to make this fun sea turtle craft for kids. If your children are anything like mine, they will get messy!

SEA SHELL TURTLES CRAFT
Materials:
- Sea shells
- Paint
- Mod Podge
- Pompoms (Let your kids go to town and decorate their turtles. We used small pompoms as feet and a larger one for the head because that’s what they felt like doing!)
- Googly eyes
- Hot glue gun
- Any additional decorations: sparkles, stickers – anything your creative artist would like to use!
Directions:
Step 1: Wash the seashells. This will ensure that the back side doesn’t look bumpy from stuck on sand or sea water. Mr. J thought he picked out the perfect one but he realized after painting it that he wasn’t thrilled with it. After painting a few different shells, he decided which shell he wanted to work with. And now I have a gorgeous bowl of painted shells on my table so that worked out great for me too!
Step 2: Let the paint dry. Cover with a thin layer of mod podge. It may look white and glue like at first, but will dry clear.
Step 3: Glue whatever color pompom on the top of the shell for the head. Hold a few seconds when gluing so the head stays on. From experience, pompoms don’t stay very well with certain glues. Add eyes with glue gun.
Step 4: Then add the feet. Again, the glue gun is best, but I always get enjoyment from seeing the concentration take over as my boys take their time for perfection. We used tiny shells for my oldest son’s turtle and pompoms for feet for Mr. R.
Step 5: Decorate any additional way they please! A cute sticker on top or an additional layer of mod podge with a sprinkle of glitter! Display your child’s masterpiece as new living room décor!
Happy Crafting,
Gina
Are you looking for more cute kid’s crafts?

Leave a Reply