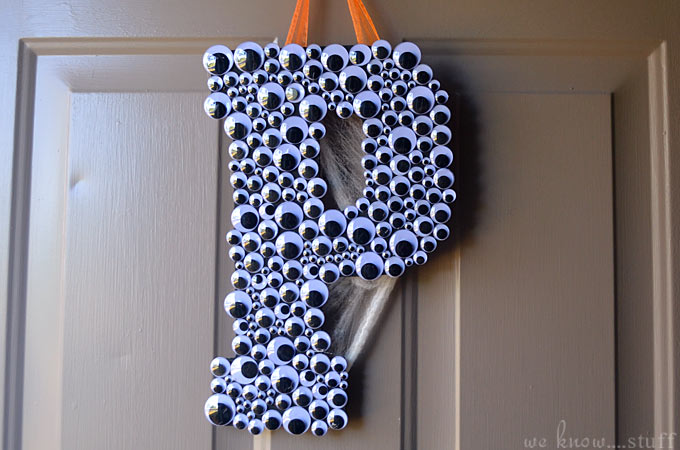
This Googly Eye Wreath is a fun DIY wreath craft that just about anyone can make. It’s a great classroom activity or kids craft for a chilly afternoon.

This is my absolute favorite time of year. While for many, Thanksgiving kicks off the holiday season, for me, Halloween is where it all begins. I wasn’t always a fan of the holiday – I’m not one for dressing up – but since having The Tornado, it’s taken on a whole new life.
Seeing life through his eyes gives the holiday a freshness and life that never existed for me before. And seeing his excitement makes me excited – and my excitement manifests through decorating the house.

For The Tornado’s first Halloween, I made a door wreath. It was insanely simple (I bought a vine wreath from Michaels, spray painted it black, and hot glued wooden Halloween symbols – also purchased at Michaels – to it), but I was ready for a new look. So I scoured Pinterest for ideas and found this Wreath at CraftCuts.
I just love how our wreath turned out. The best part about this wreath was that it looked – A) easy, B) inexpensive, and C) impressive. I hope you find it to be the same! It was even given the official seal of approval when we pulled into the driveway and The Tornado cried, “Mom! Look at all the eyes! OOOOOOOO!!!”

GOOGLY EYE WREATH
Materials:
- Your monogram letter (I painted mine black to fit with the Halloween theme.)
- Hot glue gun
- Googly eyes – I used four sizes, and needed a total of 5 packages.
- Ribbon
- Spider web and plastic spiders
Directions:
Step 1: Paint your letter the color of your choice and let dry.
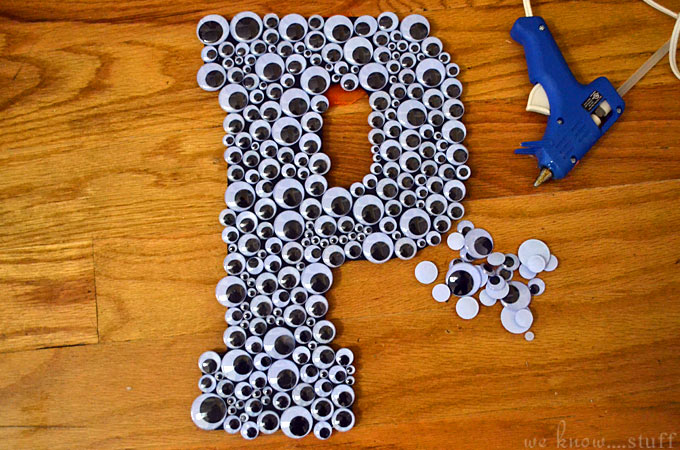
Step 2: Hot glue your googly eyes to your monogram. A couple of hints:
- Apply the hot glue, hold the gun to the eye for a second, and THEN pull away. This limits the amount of whispy hot glue strands (a serious problem of mine when working with hot glue)
- Be careful with the smaller eyes. Less work space = high chance of burning yourself!
- Play the placement by ear. I tried to place all the eyes first, and then I couldn’t glue them down without knocking everything all over the place. It worked better for me to glue them on one at a time (even if it meant I had to stop and run back to Michaels for another pack of eyes).
- Since my monogram is a ‘P’, I worked down both sides of the letter simultaneously and then everything met in the middle under the hole in the center of the letter.
- Do NOT open all the packs of eyes. Only open packages that you are currently using; this way, you can return any unopened packages.
Step 3: Measure and cut your ribbon. Hot glue it to the back of your letter.
Step 4: Tear off a hunk of the spiderweb – more is better, so it can be seen from a distance. On the back of your letter, glue it to the top, and stretch over any bare space in your monogram. Hot glue it down as you go on the back of the letter, but BE CAREFUL. Because the web is not solid, you can burn your fingers if you aren’t careful (I learned this the hard way!).
Step 5: Attach your spiders. They should stick to the web (since that’s what they were made for), but you can always use a little glue for insurance.
So tell us – now that it’s officially October, how do you get ready for Halloween?!
Brianne
Want more Halloween crafts?
Leave a Reply