Our DIY Family Organization Chart is a cinch to make and is a great tool for helping your child on the Autism Spectrum get more organized. We use ours all of the time!

This summer, we joined a host of families who started the process of packing our kid up for college. We also made a promise of heading across country to Disneyland right before the big event, as well as knocking off several items on her bucket list throughout the summer. (Ok, so I am taking liberties and calling it a bucket list, as she is FAR from that stage of life. And so am I. Despite my graying hair.) We were overwhelmed.
Thankfully, part of my husband’s work entails streamlining and creating efficiency, so the women of the house asked him to bring work home and help us make sense of all these grand plans before things were lost in the shuffle. In essence, we asked him to build us a family organization chart.
This simple process was unbelievable easy to learn and adopt. It kept us on track and kept stress to a minimum. We accomplished most everything we set out to do and credit this trick. My daughter Snapchatted a photo of her own version that she now uses in her dorm room. We think you’ll love it!

Another benefit is that those on the Autism Spectrum really, really like to know what is going to happen. This method of organizing and scheduling things keeps her involved in the process and provides a much needed visual. Plus, in a family organization chart like this the sticky notes are moveable, which provides another lesson in how we all need to learn to go with the flow. Think about it – lists written in pen are harder to adjust, right?
Here we go!
FAMILY ORGANIZATION CHART: THE STICKY NOTE SOLUTION
Materials:
- One piece of poster board
- Ruler
- Pencil
- Smaller sticky notes in different colors (color variety is key here!)
- Sharpie or other dark marker
- Somewhere to hang this and whatever is needed to make that happen

Directions:
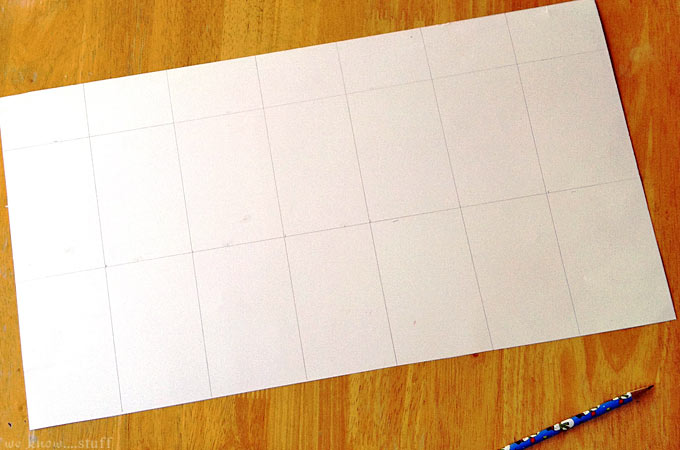
Setting up the Poster Board
1. Decide how many weeks you want to show in advance. We chose four. Any more than that will make it difficult to use.
2. Measure about ½” on the left hand side and draw a vertical line. This column is where your date will go.
3. Measure about 1-1/2” down from the top edge, and draw a horizontal line. This row is where your days of the week will go.
4. Equally divide the space by the number of weeks you will be using, and draw horizontal lines equidistant from each other. Don’t worry about trying to create perfect rows.
5. Equally divide the space by seven (for each day of the week) and draw vertical lines equidistant from each other. Again, don’t worry about getting perfect columns.
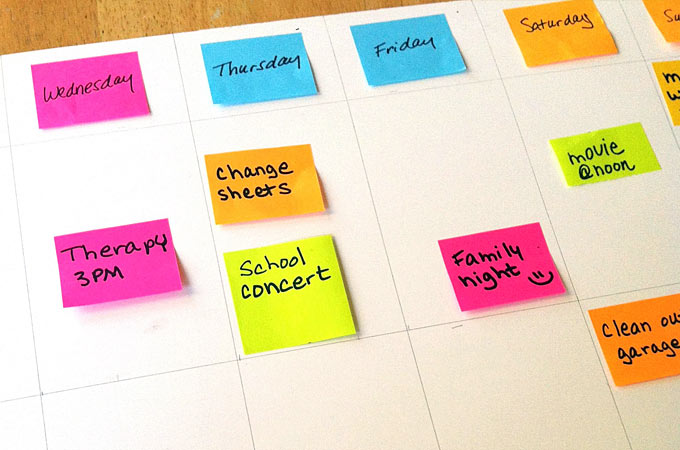
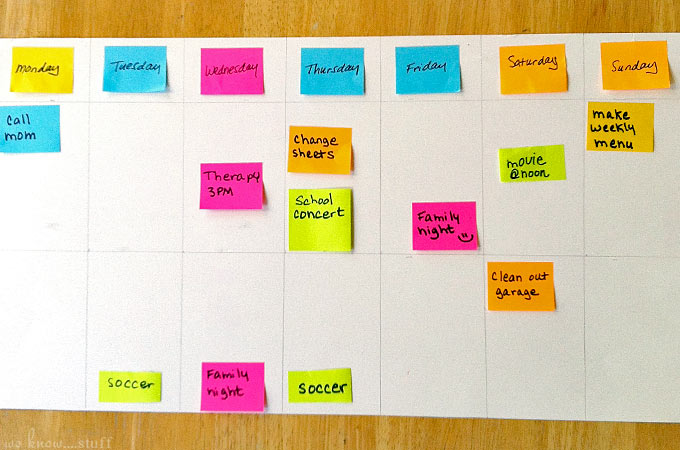
6. Using sticky notes write each day of the week on a separate sticky and place it along the top in its proper space. Choose which day YOU would like to go first! We decided to start the week with Monday. It really helped us visualize the weekend in one block.
7. Using a very thin sticky (or trim to size), write the date for the first day of each week and stick it in the leftmost column.

Using the Sticky Notes
1. We use a variety of colors, with each color having meaning. Do the same. This is an example of what I’m talking about to get you started:
a. Green – Go! This is for something done outside of the house (meeting, practice, therapy, errands, etc.)
b. Blue – Make contact with someone. This could be replying to notes, emails, calls, making appointments, etc.
c. Yellow – Chores
d. And so on… Other ideas are posting dinner menus ahead of time, family time activities, etc.
2. Be sure to make a “key” for what each color represents while everyone adjusts to this.
3. Use a dark marker so it’s super easy to read each note.
4. If you have to move a note, put a little dot in the corner. This way you know it was postponed – or someone in the house procrastinated.
5. When a task is done, stick the note to the back if it is something that will be reused. Otherwise, toss it.
6. Watch for sneaky peeps who might want to rearrange the board…
Isn’t this so easy?! We’ve always been “list” people, but this is so much cleaner. Give it a week and let me know what you think!
~Julie
Julie Clark is the published author of “Asperger’s in Pink”, which you can buy here, and speaks professionally about Autism. She is also the creative force behind Julie Clark Art. Julie is happily married and has a beautiful daughter. She is currently working on her second novel.
Looking for more articles like this? Check them out here:
- Indulging Special Interests for Children
- Pets and Children With Special Needs
- 6 Questions for Your Child’s Next IEP Meeting
- Signs of Autism Spectrum Disorder

Leave a Reply