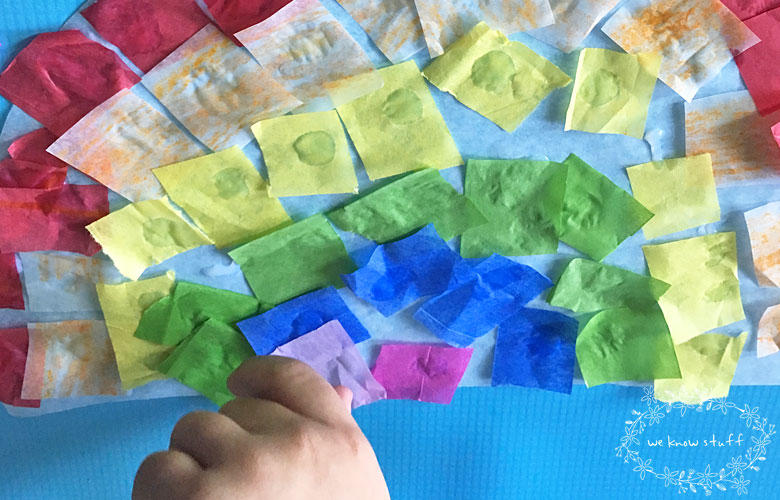
This super fun Suncatcher Craft With Tissue Paper makes really cute Stained Glass Rainbows. It’s a great sensory activity for little hands and makes an easy classroom project for spring!
 April just roared into town. And sadly, that means that I no longer have an excuse to eat Lucky Charms cereal for weeks on end.
But, it’s the turning point for warm weather. Or, as I like to think of it: I no longer have to bring a light sweater out at night in case it’s chilly. So I really can’t complain!

Since Florida is known for its sunny days, we commenced this month with sun catchers. Normally, I hit the stores for ideas and bring along the boys to brainstorm, but I’m starting to believe that half of my husband’s salary is going to crafts.
So for this suncatcher craft with tissue paper, we decided to make it from what we have at home. Hence, the leftover shamrocks hanging from our rainbows. I’ve learned not to argue with my kids when they have their hearts set on something!

My three-year-old was insistent on making a rainbow and my oldest said that it had to be raining. As they dug through the box of random stuff, even my one-year-old was handing me jewels and saying, “Love ooohh!!”

I love that they took this suncatcher craft with tissue paper and each made it their own. As much as I enjoy having items look pretty and perfect, I can’t help but keep quiet as I watch them work together…mainly because they fight a lot nowadays! 😉
Allow our craft to be a guideline, but feel free to use whatever you have around the house to make your suncatcher craft with tissue paper your own.

Suncatcher Craft With Tissue Paper: Stained Glass Rainbows
Materials:
- Wax Paper- This is a great basis because it’s sturdy but also clear to allow the sun to shine through.
- Tissue Paper- Having a large family means there’s always a party. I’m pretty sure I own pounds of tissue paper and bags for presents, but these also provide a pop of color with the translucent effect.
- Scissors
- String – We oddly couldn’t find any, but was able to tear some smaller strings from a burlap piece.
- Glue
- Decorations – Our original plan was to add raindrops, but they decided on the jewels and shamrocks to make it more fun.
Directions:
Step 1: Cut a half moon from wax paper. Set aside
Step 2: Cut strips of each color of tissue paper you desire to use. We didn’t have orange, so my three-year-old ran and grabbed a marker. He requested I cut a piece of wax paper to color it so the rainbow was correct. I love a perfectionist! Cut small squares from each strip of colored tissue paper.
Step 3: Begin gluing each color desired, however, they want onto the wax paper. A few times my little one glued a random color to the rainbow and my boys were not thrilled. It was then I realized I’ve created monsters (whoops!). Let the glue on the rainbow set.
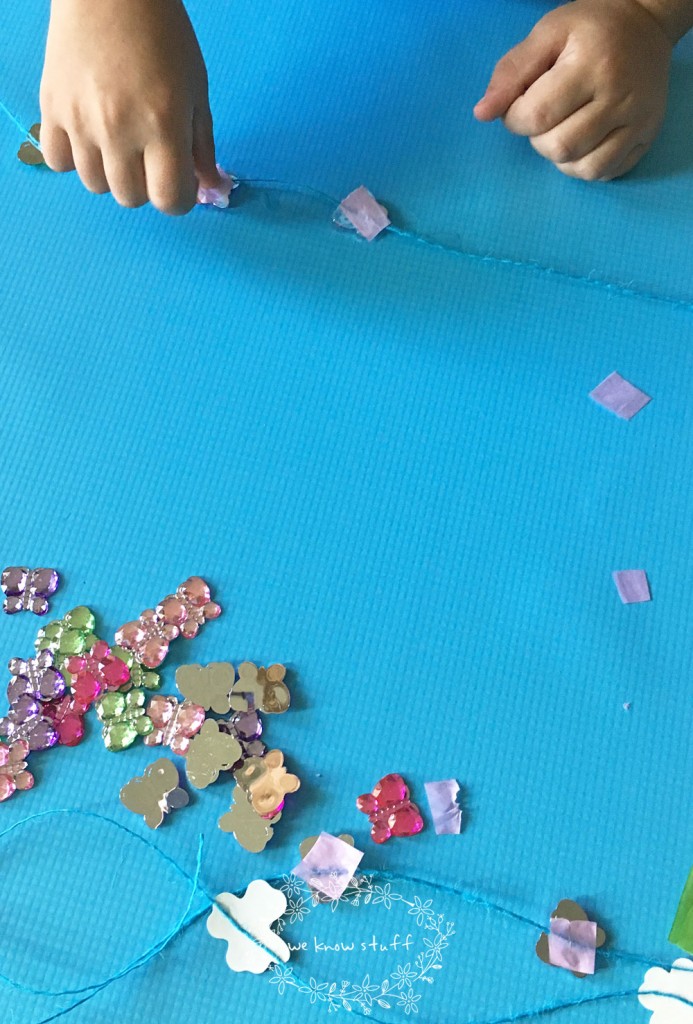
Step 4: The jewels took a few different angles of experimentation to make them stick. At first, we thought we could just glue them to the string but they kept falling off. Tape looked too messy no matter how tiny it was cut. My oldest had the idea to put glue on the jewel, lay the string on top and then place a tiny piece of tissue paper on top to hold the string in place. Genius! We added more jewels and sticker shamrocks to other strings. They both decided they didn’t want a lot of rain so we only created three strings.
Step 5: Glue the strings to the back of the rainbow. We ended up doing this the same way as the jewels. Glue, string, tissue paper. That’s it! I taped it to the window and we watched as the sun made each jewel and color of the rainbow sparkle!
Happy crafting,
Gina
Want more creative kids crafts?

Leave a Reply